Create a Multi-Level Purchase Order
Creating purchase orders in Shelf Planner is straightforward and ensures you have the right materials and products at the right time. By following this guide, you can efficiently manage both Material and Product POs, keeping your inventory optimised and reducing waste.
With multi-level purchase ordering, you can automatically generate Material POs when creating a Product PO, ensuring that all necessary materials are ordered in the right quantities and at the right time. This approach - often referred to as nested purchase ordering or MRP-driven procurement - eliminates manual guesswork, reduces the risk of stockouts, and optimizes your inventory levels.
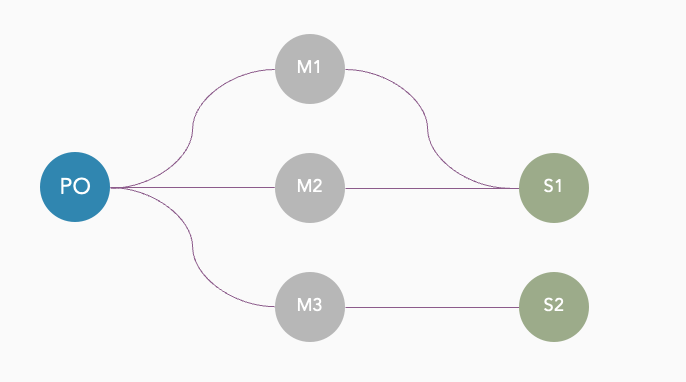
This illustration shows the relationship between product PO's, the Materials included in a Bill of Material for the product, and the connection between the different suppliers for the materials.
Multi-level Purchase Orders can only be created when you have created a Bill of Material for a product. To create a Bill of Material, please look at the article Create a Bill of Material |
Step by Step Guide to Create a Multi-Level Purchase Order
Once you have created a Bill of Material for a Product, we will automatically calculate the Material Status. We use the Material Status to understand which items to reordering, and for which items you have sufficient stock to cover future sales.
In the image below, you can see the two products we manufacture ourselves, of which one has material that is 'Out of Stock', and the second is 'Critical':

When you look at the details behind the BOM for Product 'Northern Dawn', you can see that some of the materials are critical, and only one if out of stock:
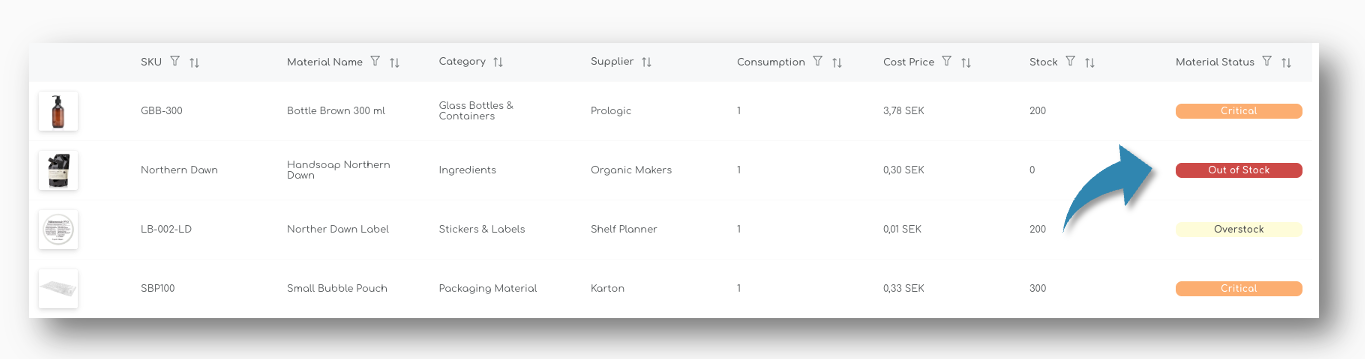
The second line item in the BOM (SKU - Northern Dawn) is out of stock, and two of the other materials are running low and have been classified as 'Critical'
In the following chapters we will use this product to create a PO for both the Finished Goods product, as well as the materials in the BOM.
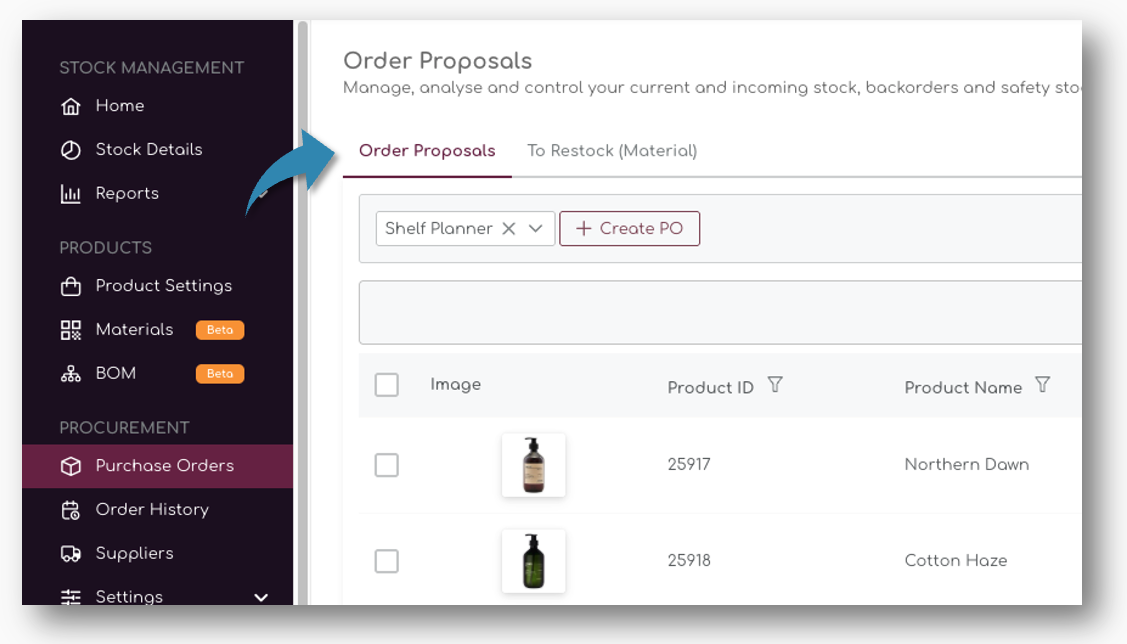
Step 1: Review Order Proposals
- Navigate to the Purchase Orders section and open the tab 'Order Proposals'.
- Review the recommended order proposals for the products and select the items you produce yourself, or for which you have created a BOM.
In this example, we have created a supplier 'Shelf Planner' for all items we manufacture ourselves.
Step 2: Select Supplier
- Select the Supplier on top of the table, this will show all items with order proposals in the table:
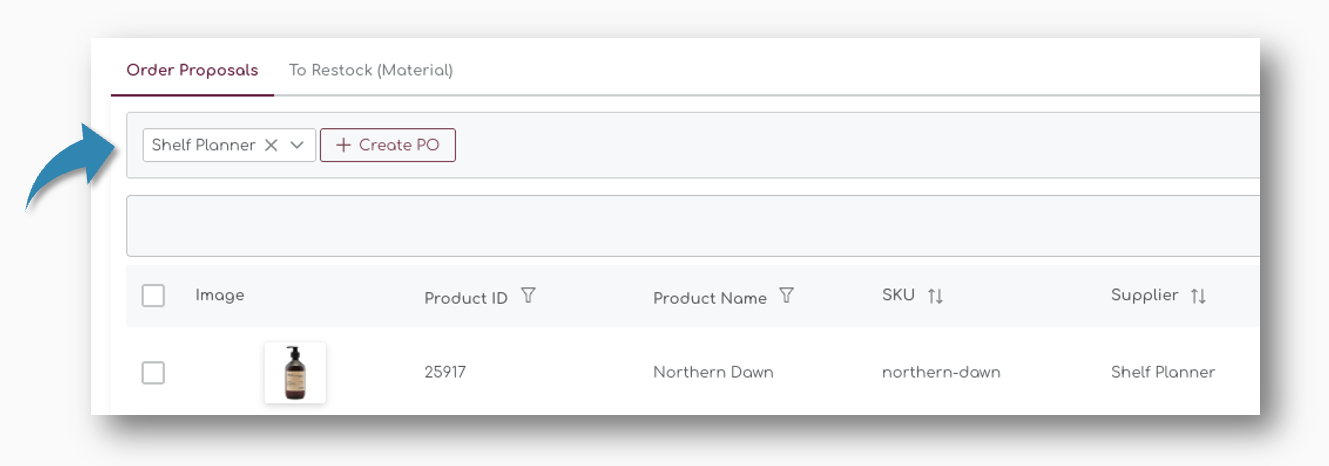
Step 3: Select Product
For the product 'Northern Dawn', we have already created a BOM, so we will use this product in the next steps.
- Select the product you want to include in your PO. Tick the boxes to the left of the items to include the items in the PO:

Step 3: Create the PO
- Click the "Create PO" button.
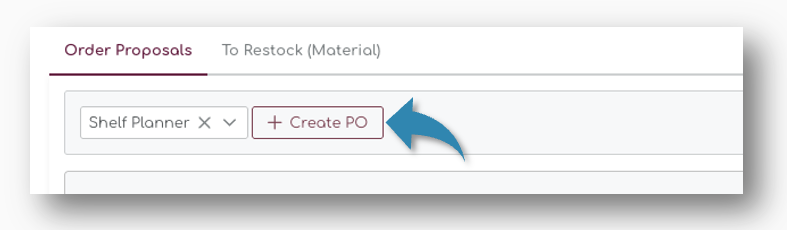
- This will open a popup where you can adjust the order details.
Step 4: Review Purchase Order Details
The Purchase Order page is devided into 4 sections:
- Order Details
- Shipment Details
- Supplier Details
- Product Details
In the next chapters, we will address each of the areas in detail.
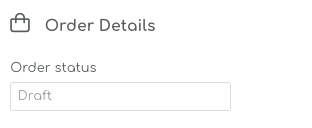
Review Order Details
On the top left of the page you will find the Order Details:
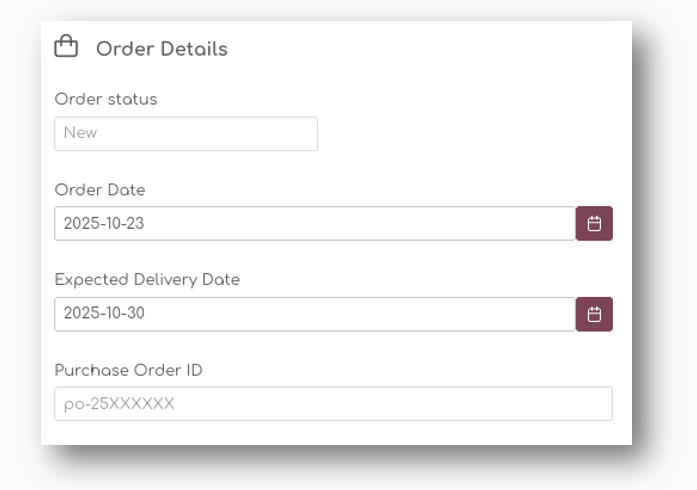
Order Status
When you create a new purchase order, you can adjust the status based on following statuses:
- New
- Draft
- On Order
- Delayed
- Completed
- Cancelled
We will describe each of these statuses in the chapters below.
Order Date
The Order Date is automatically set to the date of creation, but you can change this to any date in the future. It will also appear on the generated PDF if you export the order, and will remain the reference point for the purchase order.

Expected Delivery Date
The Expected Delivery Date is automatically generated based on longest lead time for the materials selected in the order.

Expected Delivery Dates can be updated at any time on placed orders. You can also change the status of the order to delayed - in that case you will be asked to change the ETD at the same time:

Let's say the items in the example have the following lead times:
| SKU | Lead Time (Weeks) |
|---|---|
| 501 | 2 Weeks |
| 512 | 3 weeks |
| 551 | 2 weeks |
In this case, the product with the longest lead time will determine the Expected Delivery date - **3 weeks / 21 days** from today's date.
Purchase Order ID
The Purchase Order ID is automatically generated based on the PO settings.

Shipment Details
The Shipment Details are used to determine the allocation information for the purchase order and also contain information about the Freight Method you or your suppliers can use.
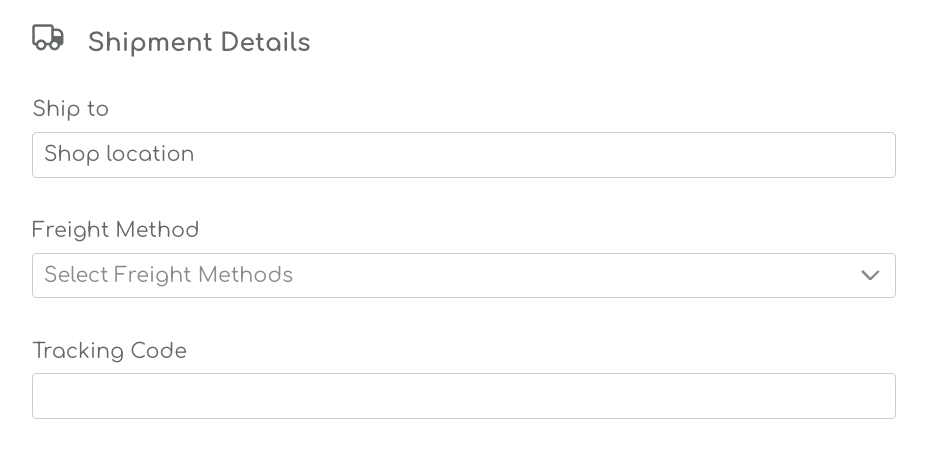
The Ship To Location is a Boost feature that is under development.
The Ship To Location is a feature that is under development. |
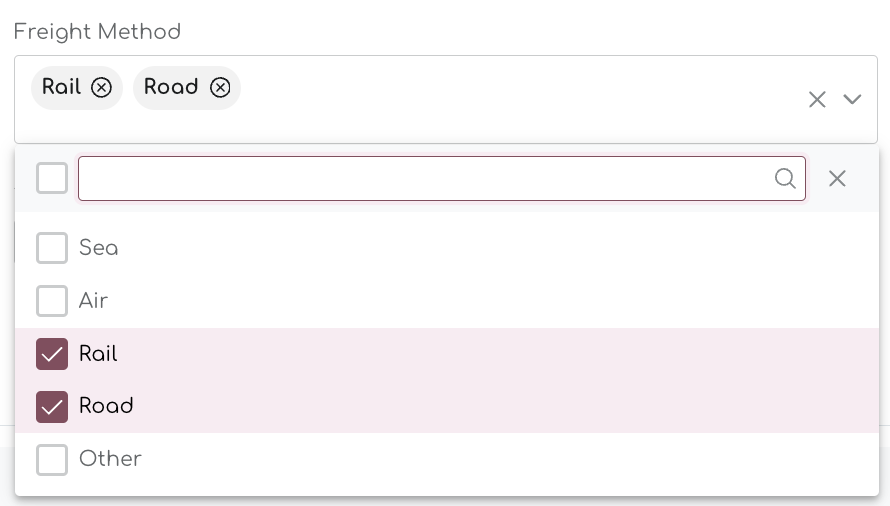
Freight Method
You can select a number of freight methods to calculate the landed cost for your orders. In the drop down, you can select multiple transportation modes:
When you select the Freight Method, you can enter the cost for each line in the Landed Cost section:
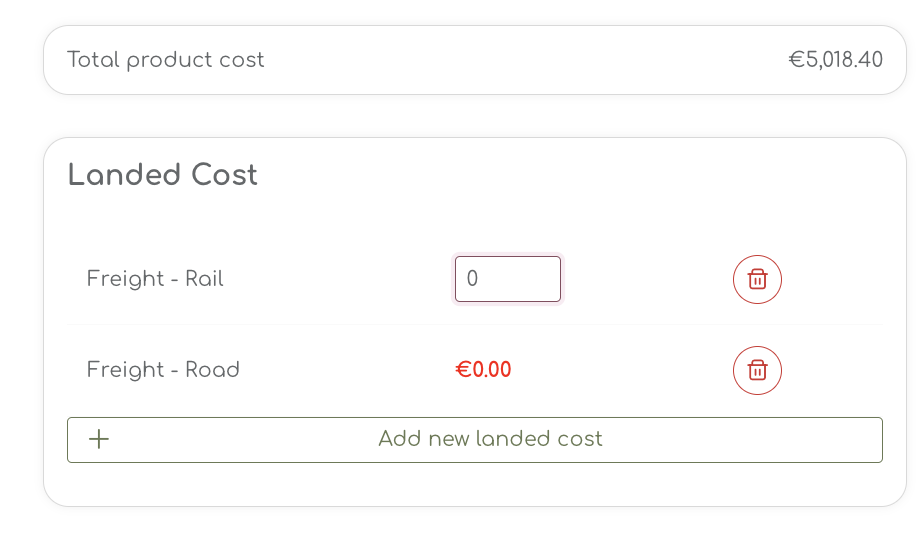
When you enter the freight cost, the Landed Cost is updated accordingly.
Step 5: Review Product Order Lines
When you generated the initial Purchase Order, the items you selected are shown in the table. As long as an order is set to status 'new', 'draft', 'On Order' or 'Delayed' you can amend the order and add or remove products from the order lines. Completed orders cannot be changed anymore.
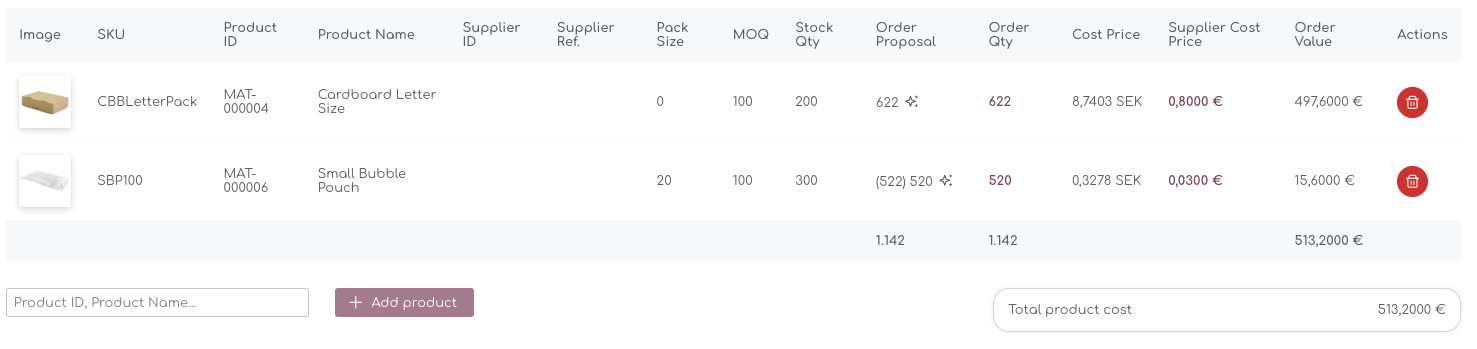
To delete a material from the order, you can use the bin under the actions in the table.
Verify the details, including quantities, supplier cost price, and expected delivery date.
Order Quantity
The order quantity is automatically pre-filled with the original order proposal. By clicking on the field, you can amend the order quantity:

For reference, we also show the Pack Sizes, MOQ's and current Stock Quantity.
Cost Price
The Cost Prices for Products you manufacture yourself are automatically updated based on the Manufacturing Cost in the BOM. In this example 94,12 SEK:

The system automatically calculates the Order Value based on the Order Quantity and the final Cost Price.
You can enter the cost prices with up to 4 decimals. You can change the settings for decimals and other values on the Account Settings pages.
Step 6: Save the Purchase Order
As a final step, you can Cancel the order, Save as Draft, or Save the PO:

Cancel the purchase order
When you cancel the order, the purchase order is binned. No stock quantities are updated or changed, and you will see the same order proposals in the main pages.
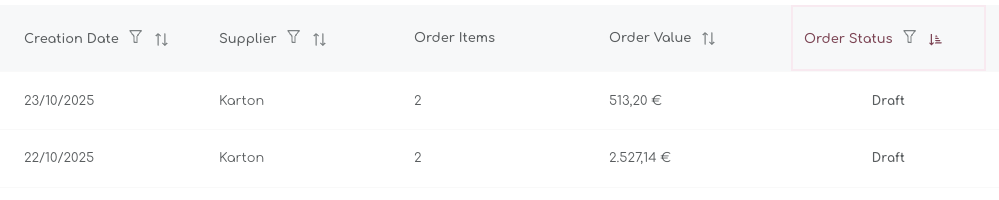
Save as Draft
When you save a PO as a Draft, you will save the PO but not stock quantities are updated yet. You can edit and amend the PO at a later stage. In the Order History pages, the PO will appear as 'Draft':
When you reopen the Draft PO, you will see the status in the Order Details automatically set to draft as well:
Save PO
When you want to place the order, you can 'Save' and the PO status will change to 'On Order':

Step 7: Create Multi-Level PO
For all items that have a BOM, the system will automatically ask you if you want to create Material orders as well. When you save the PO, a new pop up will appear, where you will be asked if you want to create purchase orders for all materials as well:
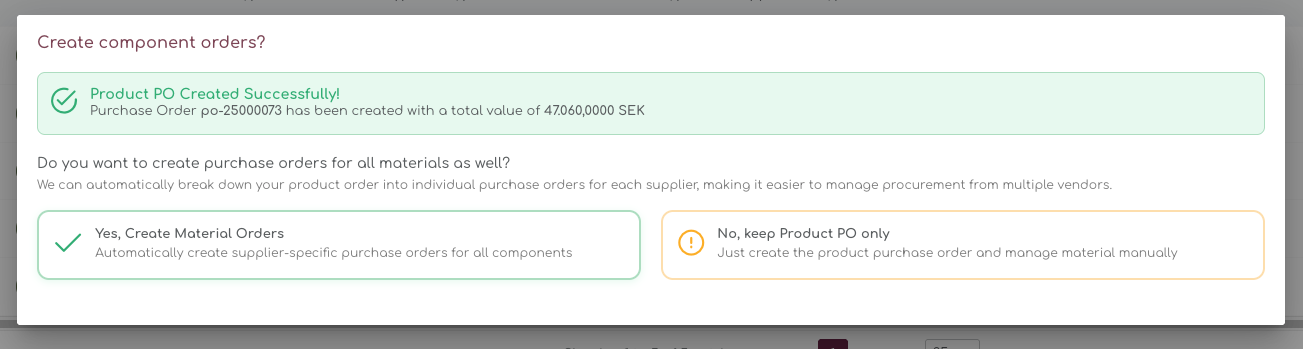
Here you can choose to attach the Material orders to the Product PO.
Cancel Multiple Level PO
- Select 'No, keep Product PO only' if you want to create only a product PO. This will return you to the main Purchase Order page and the Product PO will be created with status 'On Order'
Create Multi-Level PO
- Select 'Yes, Create Material Orders' to include the Materials into this PO.
A new screen opens where you can review all the materials that are attached to this product:
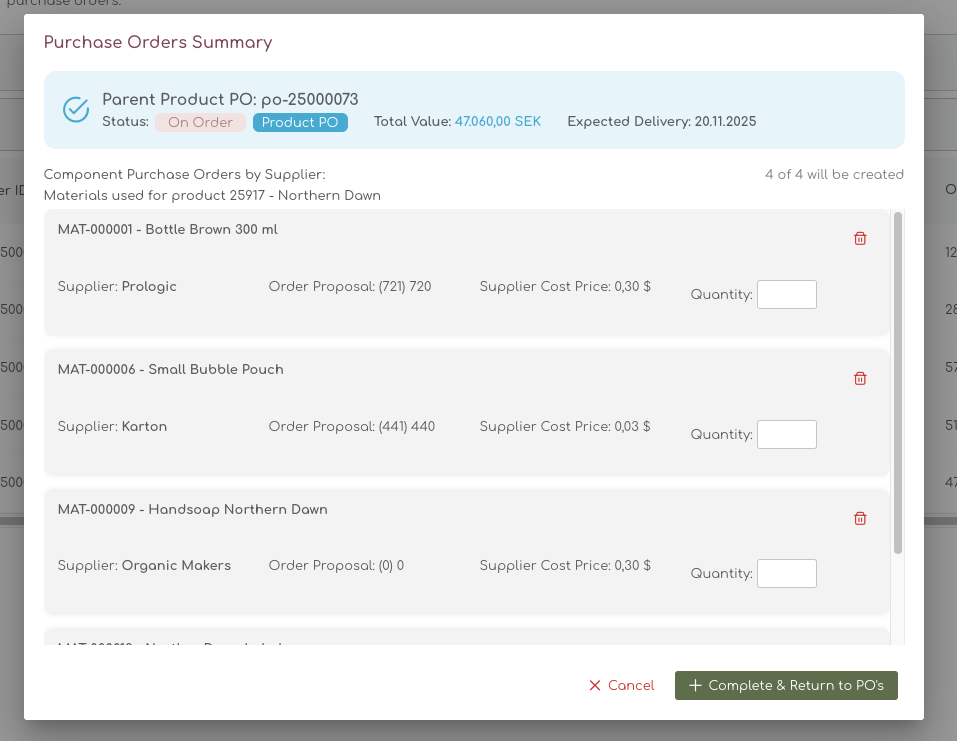
This screen allows you to review the order recommendations for all materials included in the BOM. You also have to option to delete some of the item lines if you for example already have enough stock on hand.
Step 7: Review Material Order Proposals
The Purchase Order Summary allows you to easily allow adding materials to the PO.
Parent Product PO
At this stage, the 'parent PO' has already been generated and has the status on order. It has already received a PO number, and an expected delivery date:

The next step is to decided which materials to include into the PO and create the 'child PO's' for materials.
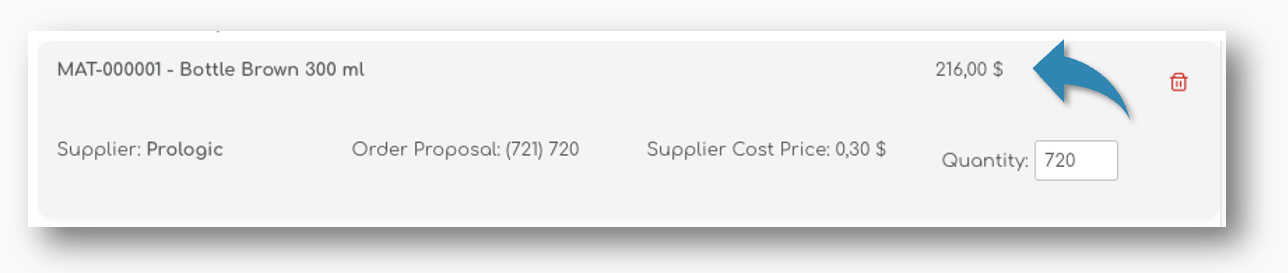
In the example, the material 'Handsoap Northern Dawn' requires no order, as it was sufficiently in stock.
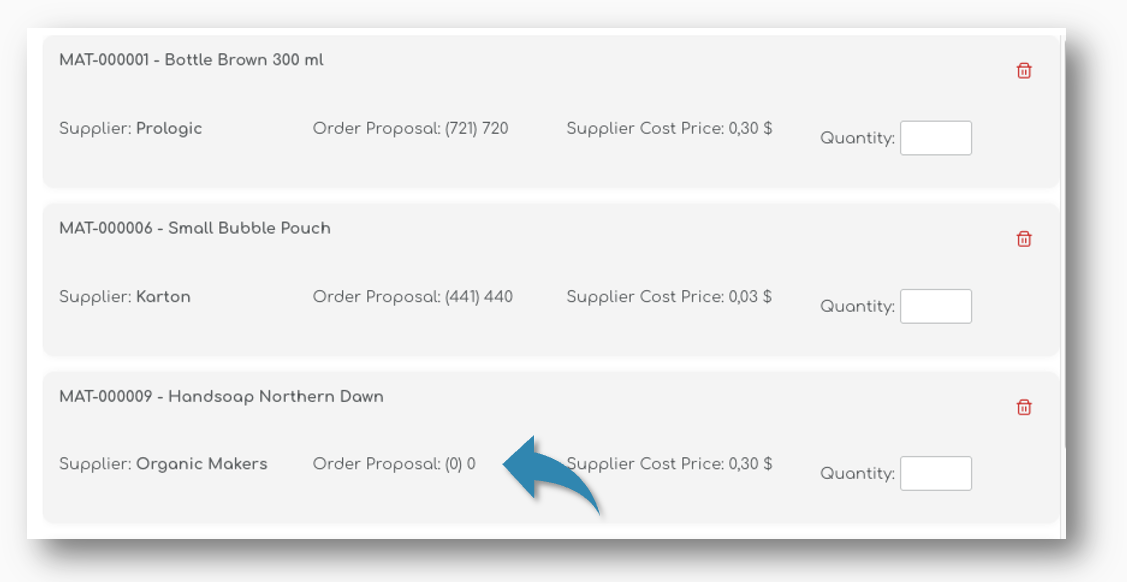
You can delete this item from the list using the garbage bin on the right of the line item. This will exclude the item from the PO:

For the remaining 2 items we want to include, the order proposal is presented. This order proposals is based not only on this product, but it is looking at all products in your store that use these materials.
When you enter the quantity, the total cost price for this item is calculated:
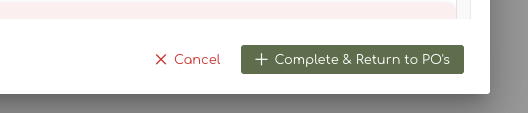
Step 8: Complete the Multi-Level PO
When you have reviewed the materials, you can 'complete & return to PO's:
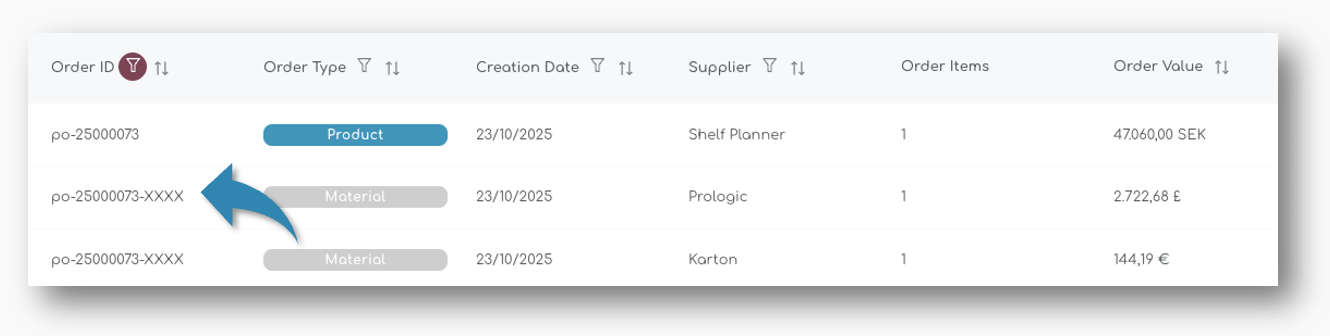
When you create the PO, the screen will close and you will get back to the Order History page. On this page you will see the PO's that are generated.
Parent & Child PO's
Every 'child order' for material is created as a draft - you still have the possibility to review the purchase order in detail:

Stock quantities have not yet been updated, and you will need to save them to complete the order and show stock as Incoming Stock.
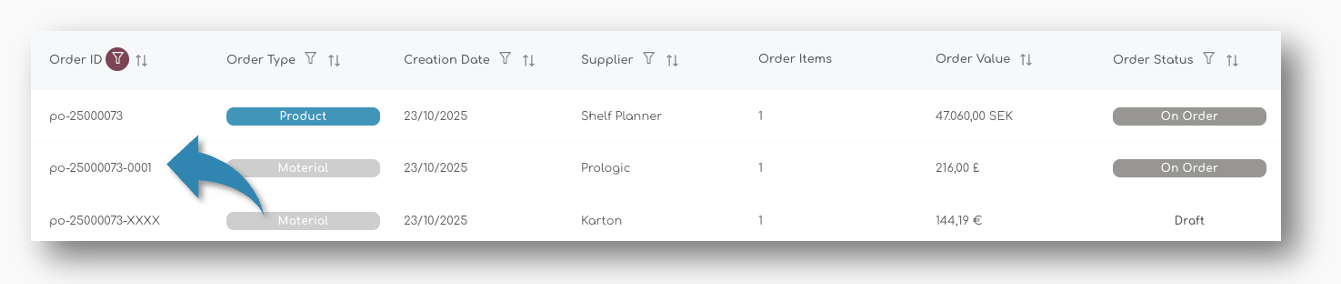
Product PO's are always classified in the system as a 'parent' PO - Material PO's inherit the PO-ID from the parent order so you can easily track related orders together.
Review Draft Child PO's
The last step is to review and finalise the child PO's for the materials. When you initially create the multi-level PO, not all the replenishment KPI's are shown. Although the recommendation in the initial pop up already shows the rounded quantity to order, in the Order Details on the PO page, you can for example do a final check on the Pack Size or MOQ's for the Material:

Similar to a regular PO, you can also update the delivery times, freight methods and other information.
When you're happy with the order, 'Save' the PO to set the status to On Order. The created PO will automatically receive its own ID: