
How to Create a Bill of Material (BOM)
What is a Bill of Materials?
A Bill of Materials (BOM) is a comprehensive list of raw materials, components, and assemblies required to construct, manufacture, or repair a product or service.
A BOM provides a structured way to manage and track the various parts that make up a finished product, ensuring that you have all the necessary components in stock and ready for production.
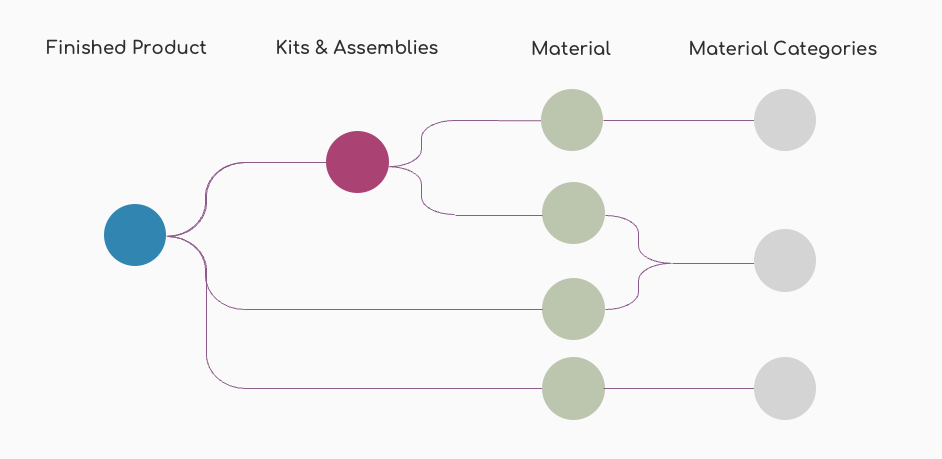
The image below illustrates the relationship between a 'Finished Good', 'Kits & Assemblies' and 'Material':
Step by Step Guide for Creating a BOM
Prerequisites
Before you start using the Bill of Materials feature, ensure that you have completed the following prerequisites:
Set Up Suppliers: Make sure that all your suppliers are set up in the Shelf Planner system.
This includes entering supplier details such as name, contact information, and any specific terms and conditions. It is important to enter the parameters important for purchasing, in particular lead times. Accurate lead times ensure that you can plan your production schedule effectively and avoid delays. Having your suppliers set up will allow you to easily associate components with their respective suppliers.
Create Materials: Ensure that all the materials and components you plan to use in your Bills of Materials are created and available in the system. This includes entering details such as material name, description, unit of measure, and any other relevant information. Having your materials set up will make it easier to add them to your BOMs and manage your inventory effectively.
Step 1: Create New Bill of Material
There are two ways to create a Bill of Material in the app - the first is from the Product Settings pages, and the second is from the BOM pages. We'll start with the product pages in this guide.
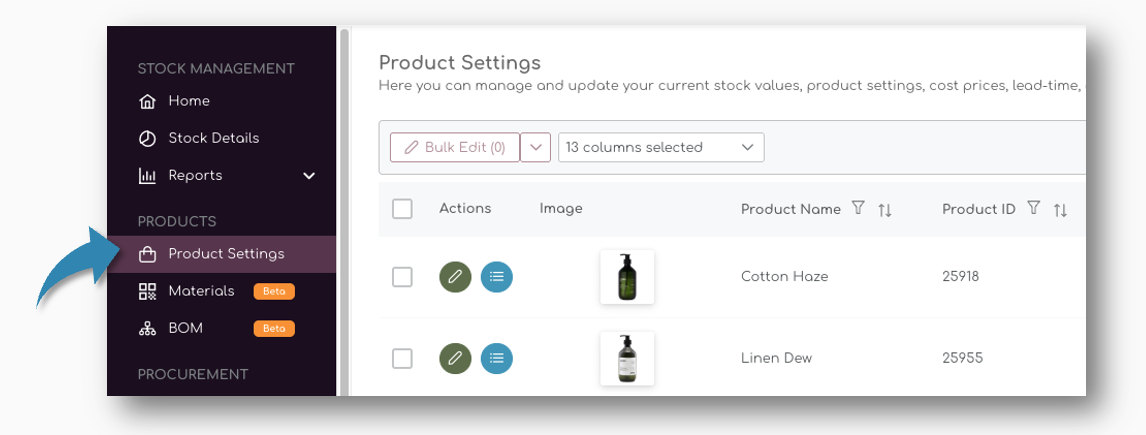
1. Navigate to Products section and open Product Settings pages:
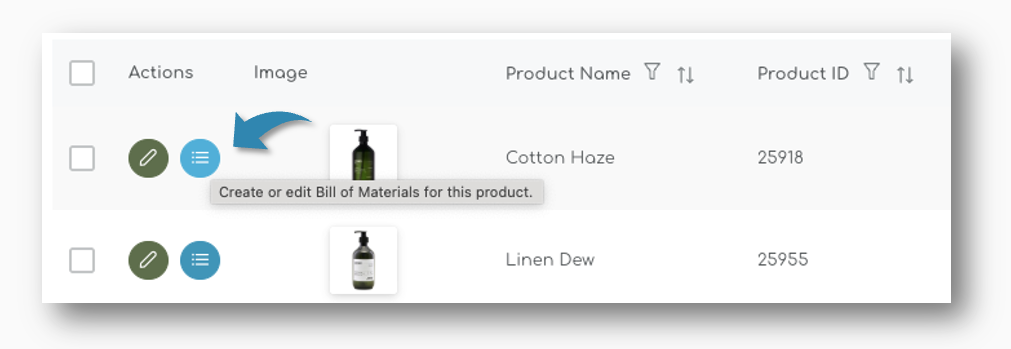
2. Select the product you want to create a BOM for and hit the teal button in the actions column to create a new Bill of Material for the item:
This will open a new screen where you can choose to either 'Include' the Finished Good into the BOM, or 'Build from Scratch'
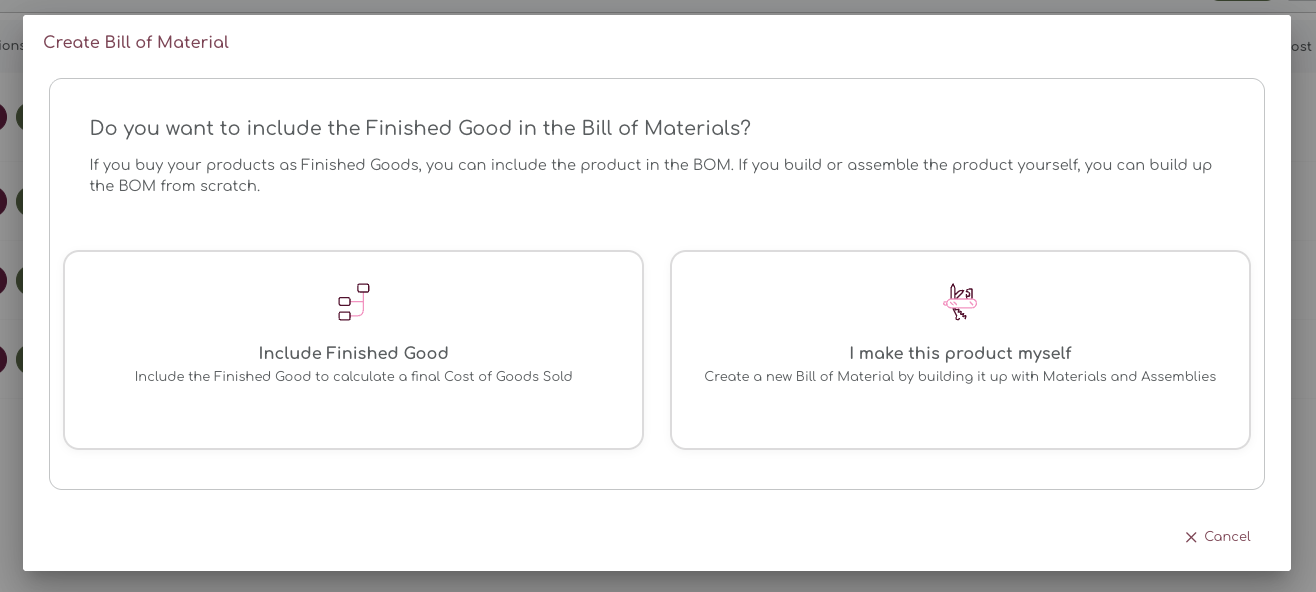
When you buy your products as finished goods, you can include them into the BOM and add other components, materials and assembled parts to create a complete bill.
In the following chapter, we will explain both methods.
Step 2: Build a BOM from Scratch
When you select 'I make this product myself', you basically source all components and materials and assemble or manufacture the finished good yourself. Selecting this option opens a new screen where you can add all materials and parts you want to add to the BOM:
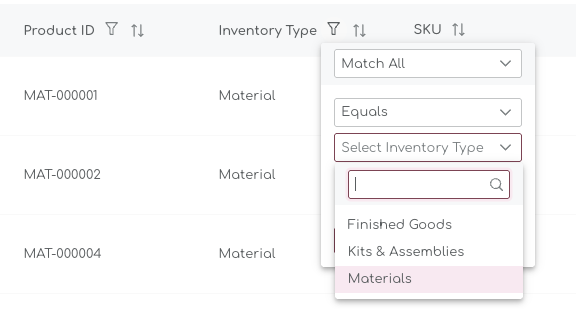
This screen offers all options, but you can easily filter by Supplier, Product ID or Inventory Type.
Inventory Type
Inventory Types differentiates between Finished Goods, Materials and Kits & Assemblies
Step 3: Select Items to Include in BOM
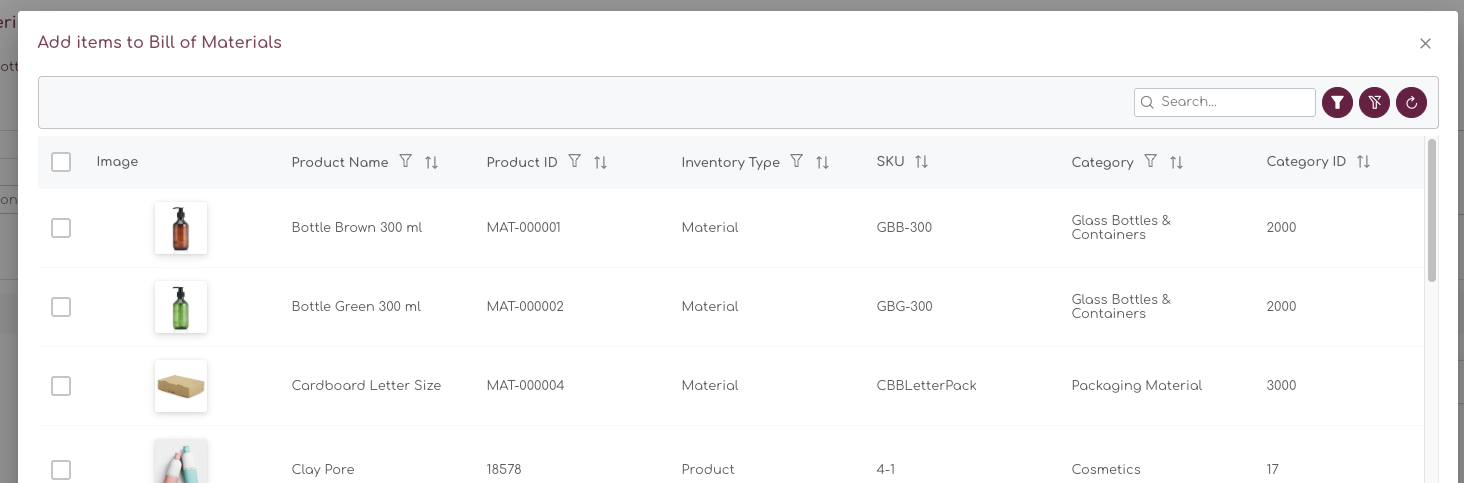
From the items shown, select the items you want to include in the BOM. Tick the boxes left of the images to include them:

You can use the filter or the search box on top of the table to find the items you're looking for. If you can't find an item, or have missed to create a material, you can always proceed from here and add it at a later stage.
When you have completed the selection, hit the 'Add selected items' at the bottom of the page:

Step 4: Review Bill of Material
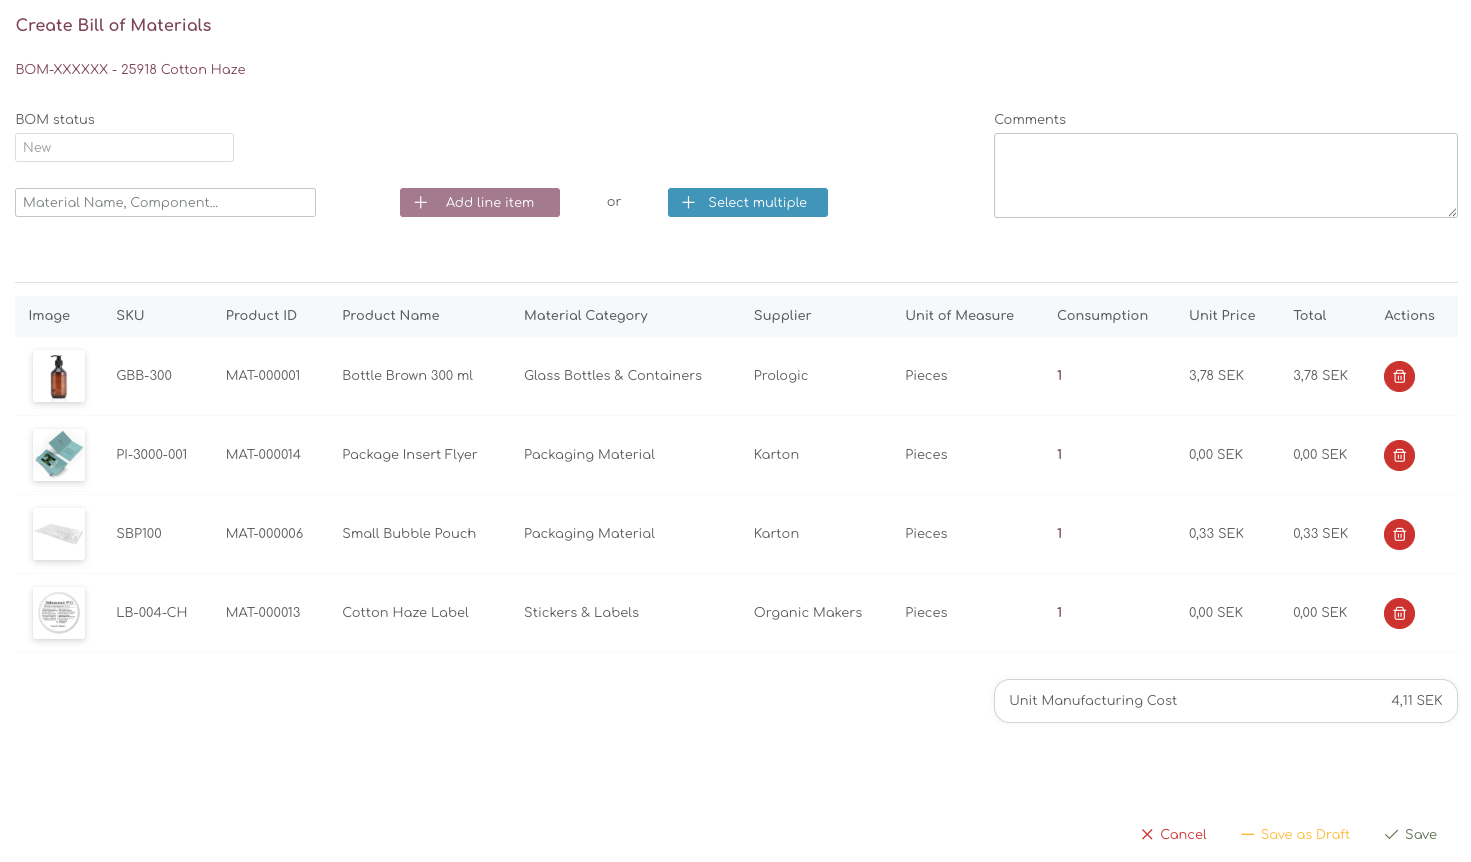
The next page shows the summary of the newly created BOM, with all line items and their informtion:
BOM Details
The Bill of Materials detail show the general information and included BOM ID, BOM Status. From here you can also add addtional products or materials:
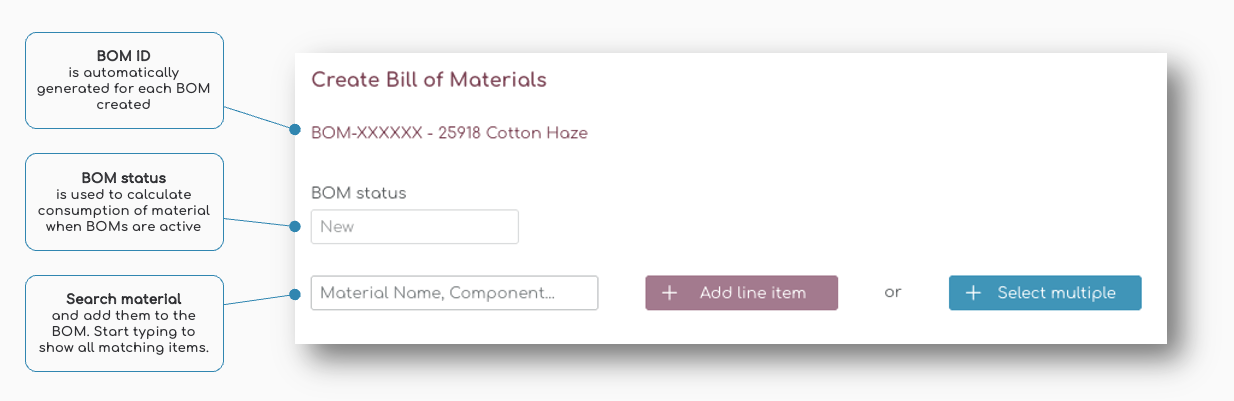
Add line Item
Simply start typing to find additional material, finished goods or components:

Alternatively, you can 'Select Multiple' and the pop up appears to add multiple items in one go. Select the product and 'Add line item':

Comments
The comments field is a free text field which can be used to leave comments to team member, or add general information to the BOM.
Step 5: Review Line Items and Consumption
When you have added all the items to the product, you can review the consumption of each material.
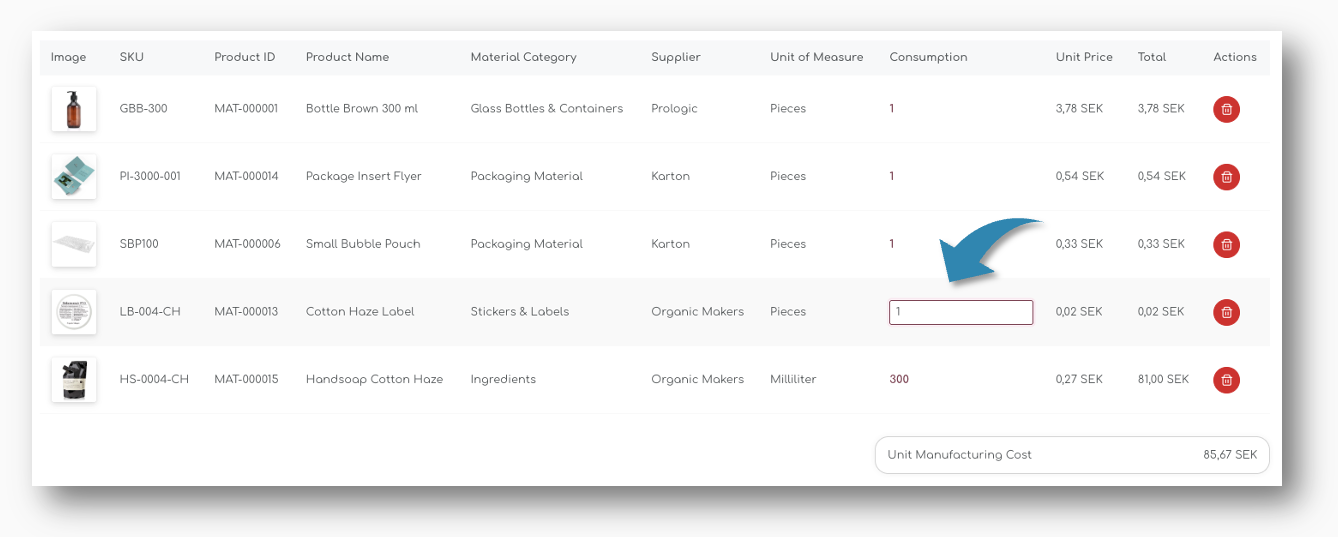
When you change the consumption, the total cost price for the line item is automatically updated. Also the total manufacturing cost is updated when you make changes to any of the items:

Step 6: Create and Save BOM
Save the Bill of Material as a Draft, or as a final BOM at the bottom of the page:

When you save the BOM, a unique BOM ID will be generated and you will be redirected to the main BOM pages.
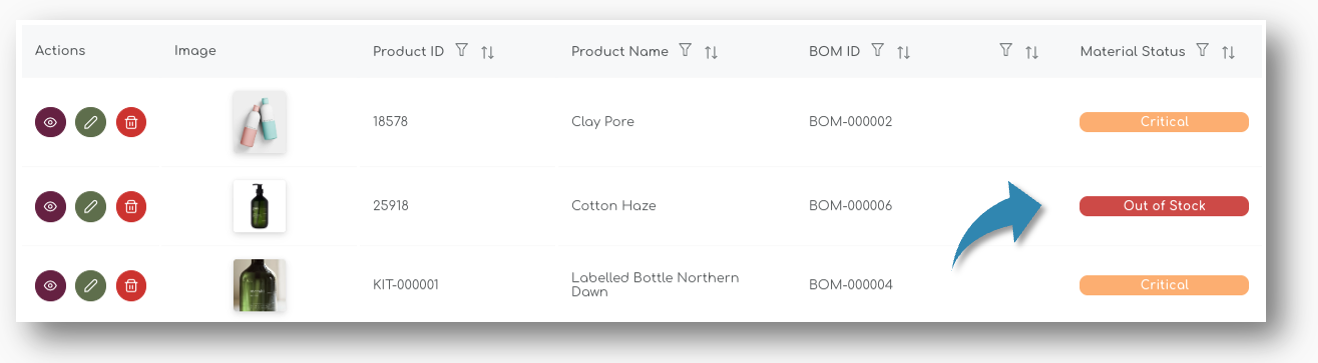
Step 7: Review Material Status
When you have saved the Bill of Material, the system will automatically generate a forecast for all materials and components.
On the main pages of the BOM, you can see the Material Status - for the item we have created in this example, the Material Status is set as 'Critical':
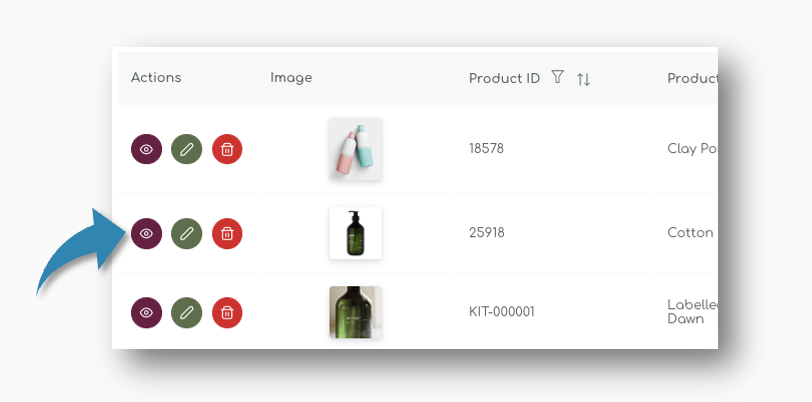
You can look at the BOM and the status of each individual material by clicking the 'eye' icon left of the table:
Material Status
For each of the line items, the Material Status is shown. Within each BOM, material statuses can vary, but the Material Status for the Finished Good is always based on the material with the lowest quantity available.
In this example, you technically cannot produce this item, as one of the materials is out of stock:
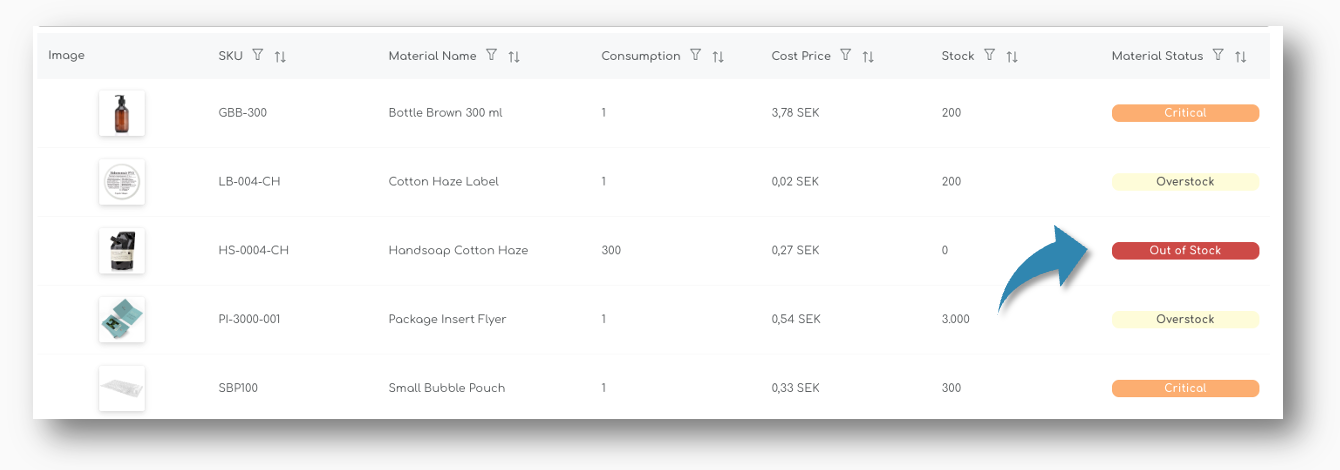
Two other Materials are classified as 'Critical', which means that there is not sufficient enough stock on hand to cover the future sales.
Stock Status Definitions
Your stock status is automatically updated based on how much stock you have compared to your Ideal Stock level (the optimal amount you want to keep in stock, based on your future sales forecast).
| Material Status | What it Means |
|---|---|
| Sufficient | You have enough stock to meet your Ideal Stock level. No action is needed. |
| Low Stock | Your stock is below the Ideal Stock level but still covers more than half of it. Consider placing an order soon. |
| Critical | Your stock is less than half of your Ideal Stock level. Order now to avoid stockouts and to avoid lost sales. |
| Out of Stock | You have no stock left. Immediate action is required to replenish your inventory. |